For the past several years I've been on-and-off recording some kinds of podcast or audio content in my upstairs office. I've hacked around with blankets, done a lot of editing in post and cranked down the gain shoving my face right up in the mic all attempting to reduce echoes in the room.
I just started a new podcast project, and decided enough is enough. It was time to get some better sound.
The project: Build some wall-mounted acoustic paneling that look good, on the cheap.
All prices in Canadian Dollars
The materials:
- Roxul Safe'N'Sound ($6.25/panel)
- 1x3 lumber from Home Depot (~$4/panel)
- Screws of varying sizes (~$1/panel with a bunch of leftovers)
- Angle Brackets ( $2.25/panel)
- Fabric ($10/panel + scraps from sewing room)
So all in I'm at about ~$23.50 Canadian per 8 sqft panel.
Finally got the first two panels fully up.
— Troy Pavlek (@troypavlek) August 9, 2018
Way more work than I bargained for. Next time I'm just going to make @mastermaq set up a studio pic.twitter.com/zR80PsbpqR
The project itself was actually quite simple and barebones. I went with Roxul Safe'N'Sound insulation over a more popular choice like Corning 703 because it's harder to get a hold of in Edmonton, Alberta. The Roxul product was available at the Home Depot by my house and, crucially, it's Good Enough™.
The first step, of course, is to paint the room. Once I put these panels up, I'm not going to want to take them down, and my office was quite plain. I wanted something more exciting.
I painted pic.twitter.com/xodWbKmH24
— Troy Pavlek (@troypavlek) July 29, 2018
If the room was just for podcasting I might have saved time and done the whole room in deep purple. But only the back half of the room is for podcasting, the front half is my office (I work remotely) and I didn't want the room to be dark and dingy when I'm trying to work. The side I face is bright and light blue, and the podcasting studio is a deep and interesting purple.
The frames are trivially constructed, I just measured 1x3 pieces of lumber from Home Depot and screwed the boards together at 90 degrees. Yes, it's a bit less stable and won't stand up to a lot of abuse. It's less secure than perhaps using a corner brace.
But it, like everything else in this project, was Good Enough™.
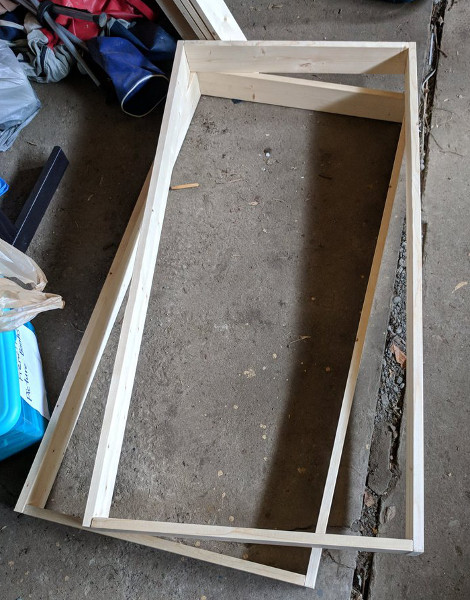
A couple completed frames
I cut the frames to exactly fit an uncut sheet of Safe'N'Sound because cutting wood with a circular saw is a much more pleasant experience than cutting mineral wool insulation.
Putting them together was quite simple, the uncut sheet of mineral wool just went inside and I used my staple gun to put whatever scrap fabric from the sewing room on the back, wrapped nicely on the front with fabrics that I picked out and purchased.
I learned after the first panel that it was worth it to hammer in some brad nails on the sides of the frame to hold the insulation in place inside as there's about an extra quarter inch of horizontal clearance inside the frame.
My project started this week: building some acousting panelling. Costs are only around $18 per 8sqft panel pic.twitter.com/AnRgQwNZrE
— Troy Pavlek (@troypavlek) June 24, 2018
Mounting the panels to the wall is, in theory, very easy. I just purchased some four inch metal corner brackets, screwed one side into the studs on the wall and slipped the other end into a notch cut on the fabric and screwed it into the frame.
No there's an angle bracket underneath the fabric that I'm screwing into to mount to wall pic.twitter.com/KBnplGF4LC
— Troy Pavlek (@troypavlek) August 9, 2018
The dimensions of my particular room made the task more difficult than I bargained for. Protip: when planning out where to mount these, give yourself at least a few inches of clearance to screw them in.
TFW the angle is too tight to fit a screwdriver pic.twitter.com/TSzRKEZMEj
— Troy Pavlek (@troypavlek) August 9, 2018
Having put together three of these bad boys, I fired up the mic and did a sound test. There's absolutely no processing, gating or filtering done on either of the tests.
Wondering if it's worth it to invest some time and materials into making acoustic paneling? The answer is an unequivocal yes #podcasts #podcasting pic.twitter.com/BgYshT9Hmf
— Troy Pavlek (@troypavlek) August 1, 2018
As you can hear, the difference is profound. Absolutely worth the effort.
You can hear the results on my new podcast being launched: Speaking Municipally, a podcast about municipal politics in Edmonton, Alberta.